Using article templates
In the Planner administration menu, you can upload article templates that can be used for the articles. The article templates must be available as an InDesign document. When creating an article in the CMS, the article templates can then be selected to create a preview of the article. This gives you an impression of how the article will look. Page templates can also function as article templates.
Article templates in WordPress
Selecting an article template
- Create a new WordPress article as usual.
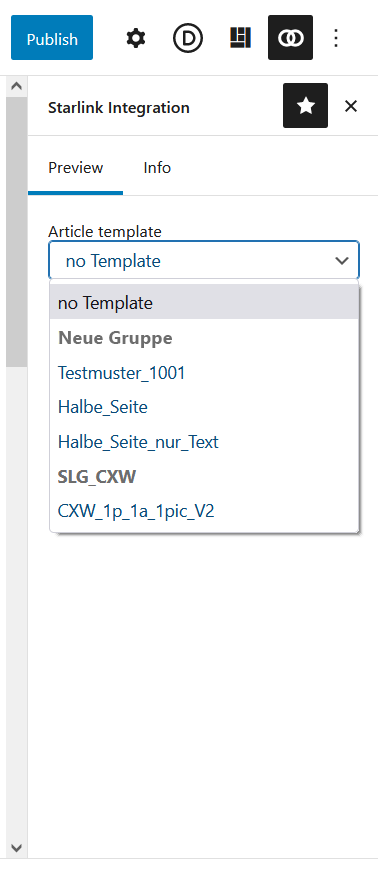
- Next to the post and block settings in the upper right corner is the Starlink Integration tab. Select the desired article template under Article template.
Display of the preview in WordPress
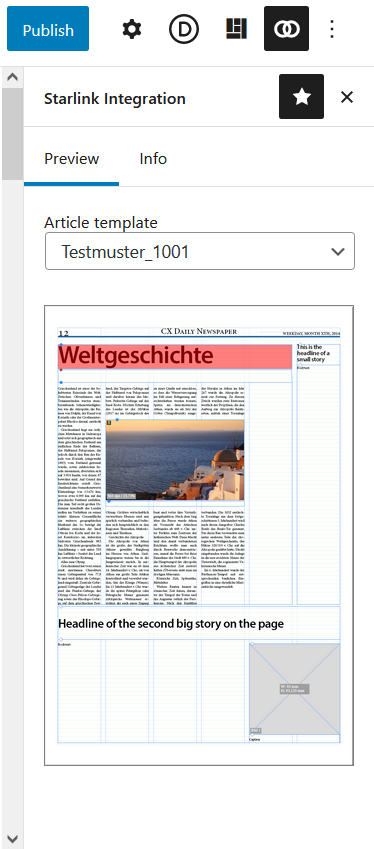
After selecting an article template in WordPress and saving the article, a preview of the article with the selected article template is displayed under the Starlink Integration tab next to the post.
Article templates in Drupal/Thunder
Initial configuration
- In Drupal or Thunder, under the Structure tab, click Content Types.
- Next to the Article content type, click Manage fields.
- Add a new field named ArticleTemplate. The field must be of type List (text), the label of the field should be ArticleTemplate so that the machine name is field_articletemplate.
- Under Allowed values list enter the names of the article templates from the admin area of the planner.

Maintaining the article templates
For Drupal, we do not yet support that the article templates are automatically managed in the CMS when article templates are created/edited/deleted in the Planner admin user interface. The administrator in Drupal must therefore manually ensure that the values of the ArticleTemplate field in Drupal correspond exactly to the names of the article templates from the Planner admin area. This must also be case sensitive.
In addition, a placeholder named no template or similar must be created, which can be selected if no article template is to be used for an article in the CMS.
Selecting an article template
- Create a new Drupal or Thunder article as usual.
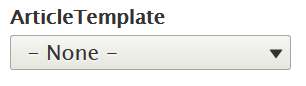
- Below the field for the article text, there is a tab ArticleTemplate. Select the desired article template here.
Displaying the preview in Drupal
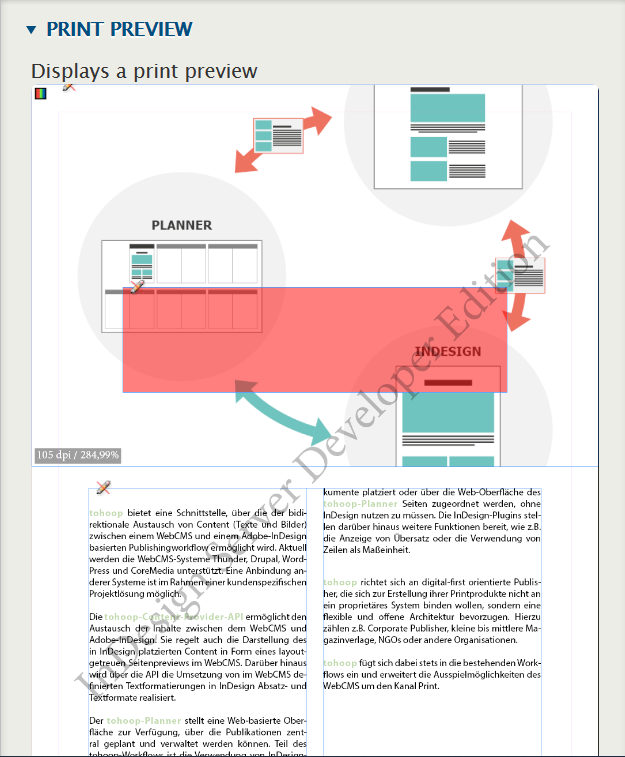
After selecting an article template in Drupal and saving the article, a preview of the article with the selected article template is displayed under the Print Preview tab next to the article.
Overset indicator in WordPress preview
If there is overset text in the headings, in the body text or in the captions of the placed articles, it is highlighted by a red marking in the text box.
Tables in WordPress
The tables from Word are taken over when they are inserted into WordPress. In WordPress, there are two different styles that can be used to format the table: Default and Stripes. If you click on the table in WordPress, you can choose the style in the block settings. To specify how the tables should look in InDesign, these styles need to be mapped to the table styles in InDesign.
- To do this, first open Planner and click Administration in the user menu at the top right.
- In the menu under Text, click on Mapped Styles.
- Click the + to set a new mapped style.
- Now, in the Cross-media Style field, enter either is-style-regular for the Default style or is-style-stripes for the Stripes style.
- In the Mapped InDesign Styles field, you can enter one or more InDesign style names.
- If you now confirm the entries, the respective WordPress table style will be interpreted as the table style you have specified for it when you place the post in InDesign.