Opening a document from the Planner
- In your publication in the Planner, click a page of the document that you want to open in InDesign.
- Select the InDesign icon in the page header.
- Log in to InDesign.
- Create the layout as usual.
Designing the layout of the page
In the opened InDesign document, you can create the layout as usual.
Saving the InDesign document
If you click Save under File in InDesign, the document is always saved on the StarLink server. If you click Save As, the document can be saved as a local copy. If you do not also click Save, the local copy may be a different version of the document than the last version saved on the server.
Creating a Content Group
What are Content Groups?
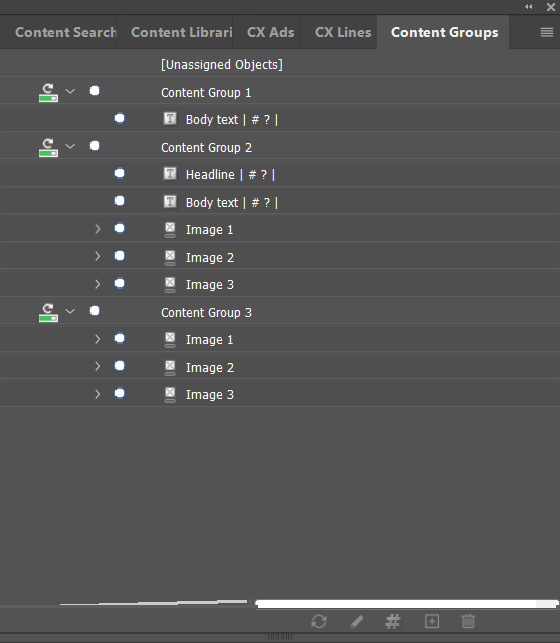
Content groups allow you to specify which layout elements should belong to an article. They consist of text and graphic boxes that are combined into a group. In order for articles from the CMS to be correctly assigned to the boxes, you must define content types such as body text, headline, caption, or credit.
When you create a graphic box, it becomes an image group Image 1 in a content group, regardless of whether you are working with image groups or not. An image group can contain one or more graphic boxes, but always only one caption and one credit. The caption and credit then apply to all images within an image group.
Create Content Group
- Create the text and graphic boxes you need.
- To define the content types, right-click a text box and choose between Body Text, Heading, Caption, Credit, and Quote under Content Type. You do not need to assign a content type to graphic boxes.
- Once you have assigned a content type to each text element, select all text and graphic boxes that should belong to a content group – that is, to an article.
- Open the Content Groups palette under Window -> Content Groups.
- To create a content group, drag the selected elements to the open Content Groups palette. Alternatively, you can right-click the boxes and select Create New Content Group.
- To assign a name to the content group, double-click the group’s title in the Content Groups palette. Now you can edit it.
Faulty and unassigned objects
In the Content Groups palette, text elements with errors are displayed in red font. Faulty text elements are those that have not been assigned to a content group or that do not have a content type. Captions and credits that cannot be assigned to an image and images that are not associated with DC-X are also highlighted in red. In addition, content groups that contain erroneous elements are displayed in red font. There is a tooltip with the error description for the faulty elements.
In the Unassigned Objects folder of the Content Groups palette, text elements are colored red if they have a content type. This is a hint to check if these elements were accidentally not assigned to a content group.
Connect caption with image
If you want to use captions and/or credits, they must be associated with the corresponding image.
- Create the text and image boxes you need.
- Assign the caption or credit content type to the text boxes.
- Select the caption and credit text boxes and the graphics box.
- Right-click the selected elements.
- Select Connect Caption to Graphic Frame or Connect Credit to Graphic Frame or Connect Caption and Credit to Graphic Frame.
Placing quotes
- Create a text box for the text of the quote and a text box for the author.
- Assign the content type Quote to the text box for the quote text and the content type Cite to the text box for the author of the quote.
- Select both text boxes and drag and drop them onto a content group in the Content Groups palette. Alternatively, you can add them to a content group by right-clicking under Assign to Content Group.
- Group both boxes in InDesign so they can be moved together.
- In WordPress, add the Quote block.
Placing info boxes
- Create a text box for both the title and the text of the info box.
- Assign the infobox_headline content type to the text box for the title and the infobox_body content type to the text box for the info box text.
- Select both text boxes and drag and drop them onto a content group in the Content Groups palette. Alternatively, you can add them to a content group by right-clicking under Assign Content Group.
- Group both boxes in InDesign so they can be moved together.
- In WordPress, add the Info Box block.
Creating lists
In the main text of the InDesign document, you can use numbered lists or bulleted lists.
- To do this, insert list blocks in WordPress. In their settings, you can choose between Ordered list, which is a list with numbering, and Unordered list, which is a list with bullets. You can specify the respective list level using the Indent list item and Outdent list item buttons.
- For each level, you must define a paragraph style in InDesign. In the paragraph style options, you can define the bullets or numbering and select the corresponding list level.

Mapping of lists in WordPress
You have to do the mapping of the lists in the admin area under Mapped Styles, specifying the name of the paragraph styles in InDesign. For example, this may look like this:
| WordPress block | Name of paragraph style in InDesign (by name of paragraph styles in InDesign) |
| List (unordered) | |
| Level 1 | ul |
| Level 2 | ul level 2 |
| Level 3 | ul level 3 |
| List (ordered) | |
| Level 1 | ol |
| Level 2 | ol level 2 |
| Level 3 | ol level 3 |
Manage Content Groups
Adding elements to Content Groups
- Assign content types to all elements that are to be added.
- Select the elements.
- Drag and drop them to the desired content group in the Content Group palette.
Alternatively, right-click the respective element under Assign to Content Group to select the desired content group.
Moving elements to other Content Groups
- Right-click the element that you want to move.
- Under Assign Content Group, select another content group.
Or:
- Open the Content Group palette.
- Select one or more elements to be moved.
- Drag and drop the element(s) to the desired content group.
Removing elements from Content Groups
- Right-click the element that you want to remove from a content group.
- Under Assign to Content Group, select another content group or No Content Group.
Rename Content Groups
- Open the Content Groups palette.
- Double-click the title of the content group to edit it.
- Confirm the new title by pressing the Enter key.
Delete Content Groups
- In the Content Groups palette, click the content group you want to delete.
- Select the trash icon at the bottom of the tab.
- Confirm the operation.
![]() Additional information: If you delete all elements of a content group in the InDesign document, the group is also deleted.
Additional information: If you delete all elements of a content group in the InDesign document, the group is also deleted.
Adding Content Groups to libraries
When a content group is added to an InDesign library, it can be placed in other documents from there. A new content group is then created in this document. If the library elements are placed several times in a document, several content groups with the same name are created. Therefore, the content group should be renamed after placement.
You can also place individual elements of a group in a library. When placing such individual elements, a content group is also created in the document. The prerequisite for this is always that the element was assigned to a content group. Elements that were not assigned to a group can also be placed in libraries and placed again. You can find them in the category Unassigned Objects.
- To export a Content Group to a library, open the Content Groups palette.
- Select one or more content groups.
- Open the menu in the upper-right corner of the Content Groups palette.
- Select Export selected Content Groups to the library or Export all Content Groups to the library. A new window will open.
- From the menu at the bottom, select Migrate library object to CC Libraries.
- Now choose between a new CC Library and an existing one.
- Confirm the process with OK.
Load content
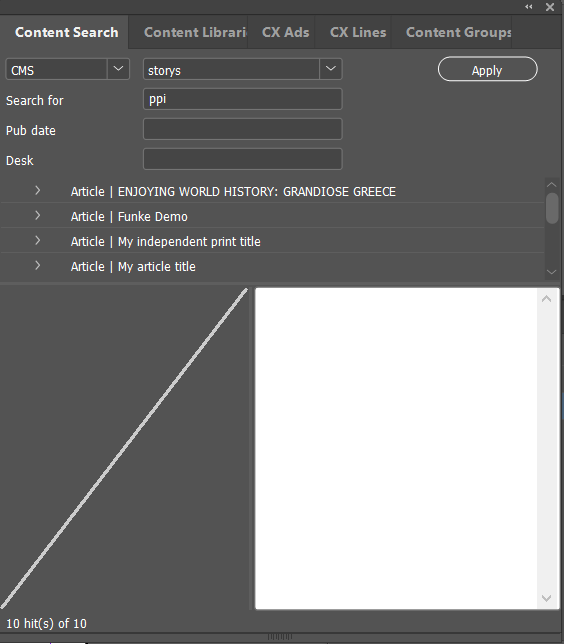
- To load articles from the CMS into the InDesign document, first open the content search via Window -> Content Search.
- Enter a search term.
- Confirm with Apply or press the Enter key. Matching articles from the CMS are now displayed in a list.
- To place an article in InDesign, drag and drop it onto the content group in which you want it to appear. When placing the article, the order of the images in the image group is taken into account.
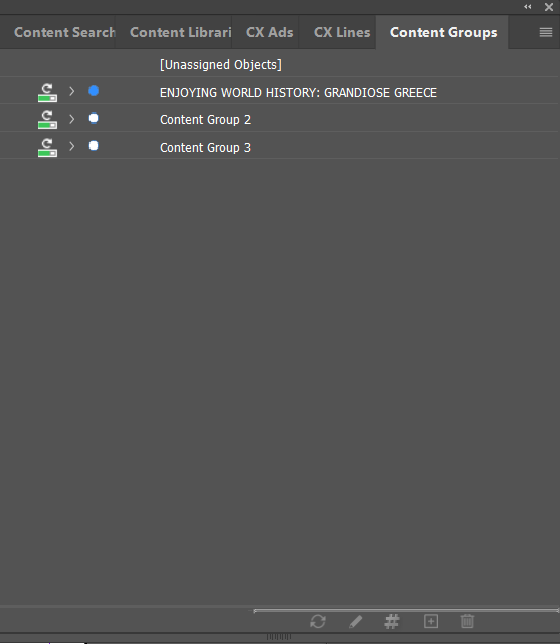
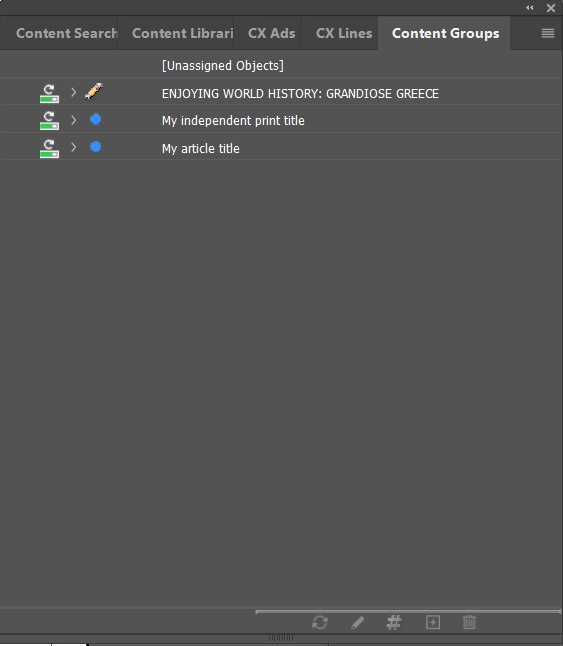
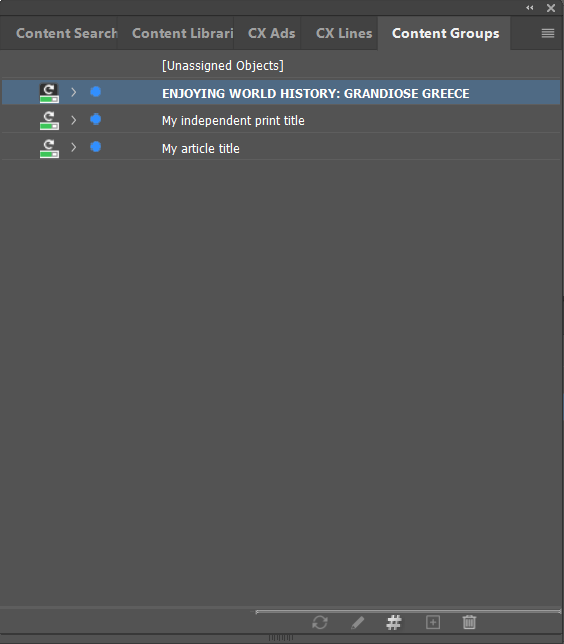
In the Content Groups palette, a white dot to the left of the content group title indicates that the group is not linked to an article on the CMS. If an article has been placed in a content group, a blue dot indicates that the content is at the same status in InDesign and the CMS. A pencil icon means that the content is currently being edited in InDesign. If there is a red dot next to an image frame, it means that there is no image inside it.
Writing modified content back to the WebCMS
If you have placed articles in your content groups and make adjustments in InDesign, you can write the changed content back to the CMS. Writing content back happens automatically and can be customized in the administration menu under Configuration -> Settings.
- To manually write content back to the CMS, click the content group you want to update in the Content Groups palette.
- Click the pencil icon at the bottom of the palette. Now the changes are applied to the CMS.
- If you want to write back all the content groups at once, click Commit All Content in Document in the palette menu in the upper-right corner.
Retrieving updates from the WebCMS
If automatic updating is enabled, the content groups in the palette will have an additional icon that can be used to toggle the update status. By clicking the icon, you can define for each content group whether it may be updated automatically or whether you want to perform the update manually.
![]() If the bar under the arrow is green, automatic updating is enabled.
If the bar under the arrow is green, automatic updating is enabled.
![]() If the bar is gray, the function is disabled.
If the bar is gray, the function is disabled.
- To update a content group manually, click the respective content group in the Content Groups palette.
- Click the arrow icon at the bottom of the palette.
- If you want to update all content groups at once, click Check for Updates in the upper-right corner of the palette menu.
Collect support information
If errors occur while working in InDesign and you need help from support, you can generate support information for them, which is stored on the server.
- In InDesign, select the Collect ppi Support Info item under the Help tab in the open document.
- Copy the name of the ZIP file.
- Write an e-mail to support@ppimedia.de with a short description of the problem, the name of the ZIP file, and screenshots if necessary.